Stippling technique for Miniature Painting
The stippling technique is a popular method used by artists to create texture and depth in miniature paintings. By applying tiny dots or small brush strokes, artists can build up layers of color, effectively simulating the appearance of texture and adding dimension to their artwork.
In this article, we will explore the stippling technique in detail and discuss how it can enhance your miniature paintings. Whether you are a beginner or an experienced artist, mastering the stippling technique can open up a world of creative possibilities.
Key Takeaways:
- The stippling technique involves creating texture and depth in miniature paintings through the use of tiny dots or brush strokes.
- Stippling can add dimension and realism to your miniatures, making them visually striking and captivating.
- Mastering the stippling technique requires practice and experimentation with different brushes and materials.
- Stippling can be combined with other miniature painting techniques to achieve unique effects and textures.
- By avoiding common mistakes and continuously advancing your skills, you can achieve impressive results with the stippling technique.
Understanding Stippling in Miniature Painting
Stippling is a fundamental technique in miniature painting that allows artists to create texture and depth by using small dots or brush strokes. This technique involves applying numerous tiny marks to build up shadows, highlights, and intricate details in the artwork. By varying the density, size, and placement of the dots, artists can achieve a wide range of effects and textures.
In the world of miniature painting, stippling is highly regarded for its ability to create realistic textures on a small scale. It is particularly useful for adding texture to surfaces such as skin, fur, fabric, and natural elements like stone or wood. Through stippling, artists can bring their miniatures to life with incredible detail and visual interest.
To apply stippling in miniature painting, artists need a few basic tools and materials. A fine-tipped brush, preferably with a rounded shape, is essential for creating precise dots. Artists may also opt for a stippling brush specifically designed for this technique. In terms of paint, acrylics are commonly used due to their quick drying time and versatility. Additionally, a smooth and stable surface, such as a primed miniature or a canvas, is crucial for obtaining the best stippling results.
Getting Started with Stippling
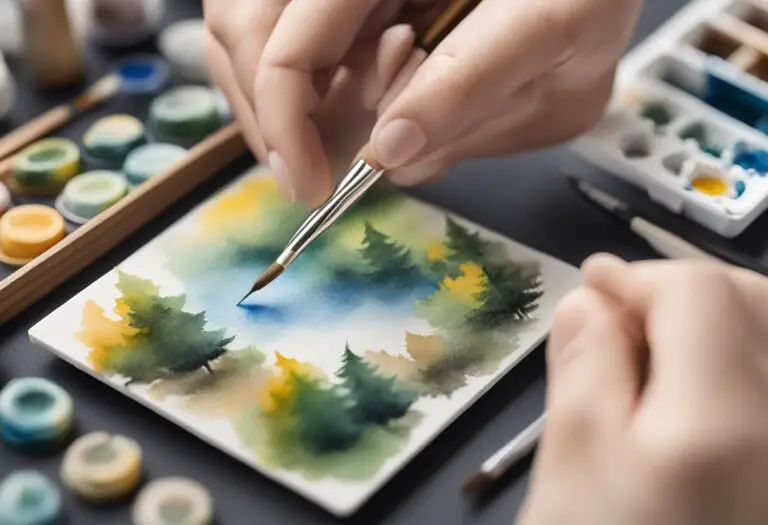
When exploring the world of miniature painting, mastering the stippling technique can add depth and texture to your artwork. Whether you’re a beginner or an experienced artist, learning how to stipple in miniature painting can greatly enhance your creations. In this section, we will guide you through the process of getting started with stippling, covering the proper technique, brush selection, and different types of stippling methods.
1. Mastering the Proper Stippling Technique
The key to achieving the desired effects in stippling lies in mastering the proper technique. To start, lightly load your brush with paint, and then gently tap the bristles onto the surface of your miniature. Aim for consistent and evenly spaced dots, varying the pressure to create different levels of shading and texture. By controlling the amount of paint and brush pressure, you can achieve intricate detailing and realistic effects.
2. Selecting the Right Brushes
Choosing the right brushes is essential for successful stippling. Opt for brushes with fine and stiff bristles that can hold shape without splaying. Synthetic brushes, such as those made with nylon or taklon, are recommended for their ability to create crisp and precise dots. Experiment with different brush sizes to achieve various dot sizes and effects.
3. Understanding Different Stippling Methods
In miniature painting, there are several stippling methods you can employ to create different textures and effects. Pointillism involves using small dots in a systematic pattern to create shading and form. Dry brush stippling uses a nearly dry brush to create a subtle textured appearance. Layering and blending stippling techniques can add depth and dimension to your miniatures. Experiment with different methods to find the one that suits your style and desired outcomes.
4. Tips and Tricks for Stippling Success
Here are a few additional tips and tricks to help you achieve the best results with stippling in miniature painting:
- Practice on a scrap piece of paper or surface before applying stippling to your actual miniature.
- Start with light colors and gradually build up darker or more vibrant shades with additional layers of stippling.
- Pay attention to the direction and angle of your stippling for desired lighting and texture effects.
- Use a light touch when stippling delicate areas or intricate details to avoid muddying or smudging the paint.
- Experiment with different paint consistencies, such as thinning the paint for more transparent stippling or using thick paint for bold and defined dots.
- Regularly clean your brushes during the stippling process to avoid unintended mixed colors or clogged bristles.
| Technique | Description |
|---|---|
| Pointillism | Create shading and form using small dots in a systematic pattern. |
| Dry Brush Stippling | Use a nearly dry brush to create a subtle textured appearance. |
| Layering and Blending | Add depth and dimension to your miniatures through the layering and blending of stippling techniques. |
By following these steps and applying the right techniques, you can unleash the full potential of stippling in your miniature paintings. With practice and experimentation, you’ll be able to create stunning and captivating artwork that showcases the unique effects achieved through stippling.
Mastering the Stippling Technique
Once you have grasped the fundamentals of the stippling technique for miniature painting, it is time to take your skills to the next level. Mastering stippling requires practice, experimentation, and a deep understanding of how to create realistic textures and effects using dots or small brush strokes.
To advance your stippling technique, consider exploring different approaches to stippling. Experiment with varying brush sizes, pressure, and techniques to create unique textures and shading effects. By mastering different stippling methods, you can enhance the overall depth and visual appeal of your miniature artwork.
One key aspect of mastering stippling is building confidence in your abilities. Like any skill, stippling requires practice and patience. Dedicate time to regular practice sessions where you can refine your technique and explore new possibilities. As you gain confidence, you’ll find yourself taking bolder strokes and producing more intricate details in your miniatures.
Additionally, studying and analyzing the work of renowned miniature artists can greatly contribute to your mastery of stippling. Pay attention to the techniques they employ and how they achieve remarkable results. Consider attending workshops or participating in online tutorials that specifically focus on stippling for miniatures. These resources can provide valuable insights and guidance to help you refine your stippling skills further.
Remember that mastery is a journey, and there is always room for growth and improvement. Embrace the process of continuous learning and experimentation, and don’t be afraid to push the boundaries of what you can achieve with the stippling technique. With dedication and practice, you can become a true master of stippling in miniature painting.
Enhancing Miniatures with Stippling
Stippling is a versatile technique that can significantly enhance miniature paintings, adding depth, texture, and intricate details. By using precise dots or small brush strokes, artists can create stunning effects that bring their miniatures to life. Whether it’s adding fine details to a character’s face, creating realistic textures on clothing, or highlighting intricate patterns on objects, stippling offers endless possibilities for enhancing miniature artwork.
One of the key benefits of stippling in miniature painting is its ability to create the illusion of texture. By varying the size, density, and spacing of the dots, artists can simulate different surfaces such as rough stone, soft fabric, or even glossy metal. This technique adds a realistic tactile quality to the miniatures, making them visually appealing and engaging.
In addition to texture, stippling is effective in creating highlights and shadows. By strategically placing dots of lighter or darker colors, artists can achieve a three-dimensional effect, enhancing the depth and volume of their miniatures. This technique is particularly useful when highlighting intricate details or creating realistic lighting effects.
Stippling can also be utilized in specific scenarios to achieve desired effects. For example, when painting vegetation, stippling can be used to create a realistic impression of leaves or foliage. By carefully layering and blending different shades of green dots, artists can capture the intricate patterns and textures found in nature. Similarly, stippling can be used to mimic the texture and appearance of fur or feathers on miniature creatures, adding a touch of realism to these elements.
To further demonstrate the effectiveness of stippling in enhancing miniatures, here are some examples:
Giving Miniatures an Aged Look
Stippling can be used to create an aged or weathered look, adding character and history to miniatures. By applying a combination of small dots in various shades, artists can simulate the effect of cracks, worn edges, and faded colors, giving the miniatures a vintage and weather-beaten appearance.
Creating Textured Surfaces
Stippling can be employed to create intricate and realistic textured surfaces on miniatures. Whether it’s the rough scales of a dragon, the pebbled surface of a stone pathway, or the bumpy texture of tree bark, stippling allows artists to capture the fine details and unique characteristics of various materials.
Adding Depth to Accessories
Accessories such as weapons, jewelry, or pottery can greatly benefit from the stippling technique. By using stippling to create shadows and highlights, these miniature objects can appear more realistic and three-dimensional, enhancing their overall visual impact.
Overall, stippling offers miniature painters a valuable tool for enhancing their artwork. With its ability to create texture, highlights, and shadows, stippling brings miniatures to life, adding depth and realism. By exploring the various ways stippling can be utilized, artists can unlock new levels of creativity and elevate their miniature painting skills to new heights.
Tools and Materials for Stippling in Miniature Painting
When it comes to achieving stunning stippling effects in miniature painting, having the right tools and materials is essential. The following are some of the key items you’ll need to create intricate textures and detailed shading with the stippling technique.
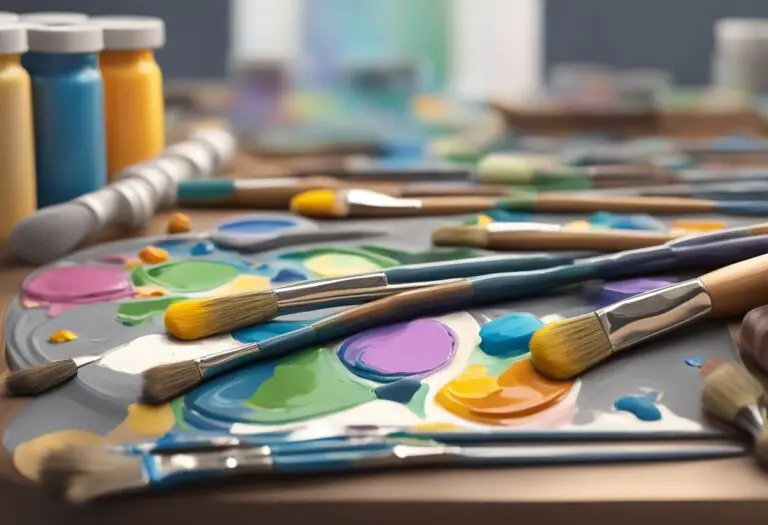
1. Brushes:
Choose brushes with fine, soft bristles to achieve precise stippled dots. Synthetic brushes are often preferred for their ability to hold paint well and maintain their shape. Use a selection of brush sizes to vary the dot sizes and create different effects.
2. Paints:
Acrylic paints are commonly used in miniature painting due to their versatility and quick drying time. Opt for high-quality, pigmented paints that provide smooth coverage. Choose a range of colors to create depth and realism in your miniatures.
3. Surfaces:
Miniature painting typically involves working on small surfaces, such as miniatures themselves or bases. Select a smooth surface that allows for precise stippling. Primed surfaces provide an ideal base for paint adherence.
4. Additional Tools:
While brushes and paints are the primary tools for stippling in miniature painting, there are other useful tools that can enhance the technique:
- Palette: Use a palette or a paint tray to mix colors and control the consistency of the paint for stippling.
- Water container: Have a container of water nearby to clean your brushes between colors and maintain their performance.
- Masking tape: Use masking tape to create clean, defined edges or to protect certain areas of your miniature while stippling.
- Palette knife: A palette knife can be helpful for mixing paints and creating unique color blends for stippling effects.
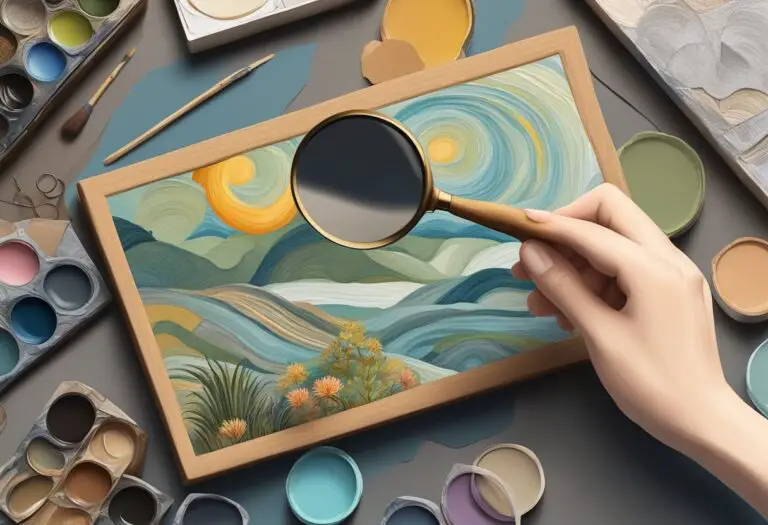
- Magnifying lamp: Consider using a magnifying lamp to help you see the intricate details of your stippling work, especially with small miniatures.
By equipping yourself with the right tools and materials, you’ll be well-prepared to explore the endless creative possibilities of the stippling technique in miniature painting.
Stippling Tips and Tricks
When it comes to achieving the best results with stippling in miniature painting, a few tips and tricks can make all the difference. Brush control, color mixing, and creating various textures through stippling are key areas to focus on. Additionally, being aware of common stippling challenges and having troubleshooting advice can help you overcome any obstacles. Here are some helpful tips and tricks to enhance your stippling technique:
- Choose the right brush: Selecting the appropriate brush for stippling is crucial. Opt for a brush with short bristles and a rounded shape, which allows for better control and precision during the stippling process.
- Practice brush control: Stippling requires proper brush control to create different effects. Experiment with different pressures and motions to achieve various levels of texture and shading. Try using a light touch for softer textures and a heavier touch for more pronounced effects.
- Master color mixing: Mixing your colors correctly can greatly enhance the impact of stippling. Blend colors on your palette to create gradients and variations that can be applied through stippling. This technique allows for smooth transitions and realistic shading in your miniature paintings.
- Create different textures: Stippling is excellent for adding texture to your miniatures. Vary the size and density of your stippling dots to create different textures, such as rough surfaces, fur, or fabric. This technique adds depth and interest to your artwork.
- Experiment with different materials: Stippling can be done with various materials, including acrylic paints, ink washes, or even stippling pens. Explore different materials and see which ones work best for your desired effects and painting style.
- Pay attention to lighting: Consider the source of light in your miniature painting and use stippling to create highlights and shadows accordingly. By strategically placing stippling dots, you can simulate the play of light on surfaces, adding realism to your artwork.
- Troubleshoot common challenges: Stippling may come with its fair share of challenges. Some common issues include uneven dot sizes, blurring or smudging, and difficulty in achieving a consistent pattern. If you encounter these challenges, don’t be discouraged; practice and experimentation with brush control and pressure will help you overcome them.
By incorporating these tips and tricks into your stippling technique, you can elevate your miniature painting to new levels. Remember, practice and experimentation are key to mastering the art of stippling. Keep exploring and pushing the boundaries of what stippling can achieve in your miniatures.
Exploring Stippling Effects
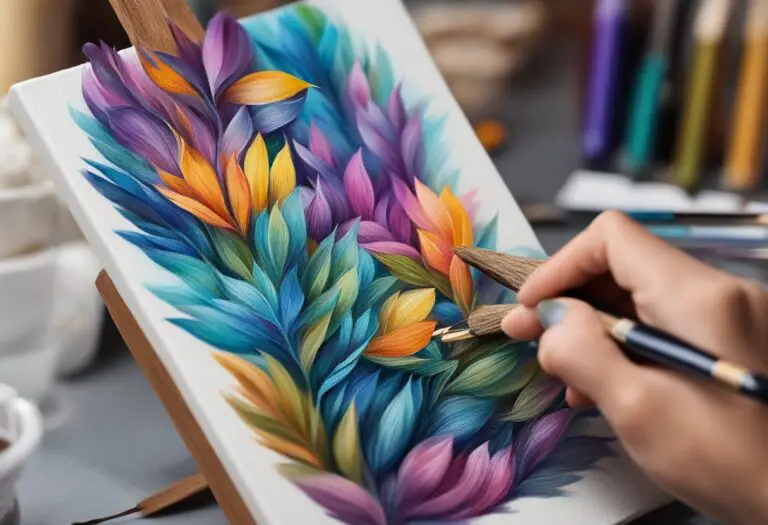
Stippling, a technique widely used in miniature painting, offers artists the ability to create a myriad of fascinating effects that add depth, texture, and visual interest to their artworks. By employing the stippling technique for miniature painting, artists can achieve various textures, patterns, and shading effects that bring their miniatures to life.
One of the primary advantages of stippling is its ability to create realistic textures on miniatures. By using a series of small dots or brush strokes, artists can mimic the appearance of rough surfaces, such as stone, wood, or fur. This meticulous technique allows for precise control over the placement and intensity of each dot, resulting in finely detailed and visually captivating textures.
| Stippling Effects | Description |
|---|---|
| Textured Surfaces | Stippling can simulate a wide range of textures like scales, rough skin, or metal surfaces, adding depth and realism to miniatures. |
| Shadow and Shading | By varying the density and size of stippled dots, artists can create convincing shadows and shading, enhancing the three-dimensional quality of their miniatures. This technique is particularly effective for creating depth in recessed areas. |
| Patterned Effects | Stippling can be used to create intricate patterns and designs, such as the subtle stippled dots seen in fabric or the precise dots forming the scales of a dragon. |
Furthermore, stippling can be utilized to replicate different materials and surfaces found in miniatures. For instance, by varying the density and arrangement of stippled dots, artists can depict the glistening surface of water, the rugged texture of tree bark, or the smoothness of glass. This versatility gives artists the freedom to experiment and explore various creative possibilities.
Through the exploration of stippling effects, artists can unlock their miniatures’ full potential, breathing life and character into their creations. By harnessing the power of texture, shading, and pattern, artists can create visual experiences that capture the imagination and leave a lasting impression on viewers. The stippling technique for miniature painting offers a versatile and captivating approach to bringing miniatures to life.
Stippling Tutorial for Miniatures
Mastering the stippling technique for miniature painting can greatly enhance the texture and visual appeal of your artwork. This step-by-step tutorial will guide you through the process of applying stippling to create realistic texture, highlights, and shadows in your miniature paintings.
Materials Needed:
- Fine-tipped brushes in various sizes
- Acrylic paints in desired colors
- A miniature painting surface
- A palette or paint mixing tray
Step 1: Prepare Your Workspace
Before you begin stippling, ensure that your workspace is clean and well-lit. Arrange your materials conveniently within reach and have a clear vision of your desired outcome. This will help you maintain focus and precision throughout the process.
Step 2: Create a Base Layer
Start by applying a base layer of paint to your miniature using a brush of your choice. This will provide a foundation for the stippling technique to adhere to. Allow the base layer to dry completely before proceeding to the next step.
Step 3: Choose your Stippling Brush
Select a brush size that suits the scale of your miniature. For larger areas, use a larger brush, while a smaller brush is more suitable for intricate details. The bristles of your brush should be firm and tightly packed to create precise stippling marks.
Step 4: Load the Brush with Paint
Dip the tip of your stippling brush into the desired paint color. Tap off any excess paint on a palette or paper towel. Ensure that the brush is loaded with paint but not saturated, as this can lead to excessive bleeding or smearing of the dots.
Step 5: Begin Stippling
Hold the brush perpendicular to the miniature surface and lightly tap or dab the brush onto the area you wish to stipple. Create a rhythmic motion, applying dots in various densities to achieve the desired texture and shading. Start with lighter shades and gradually build up darker tones to create depth and dimension.
Step 6: Blend and Refine
Use a clean, dry brush to lightly blend and refine the stippling marks. This will help create a smoother transition between the dots and blend any harsh edges. Take your time and work in layers, adjusting the intensity of the stippling as needed.
Step 7: Add Highlights and Shadows
To bring your miniature to life, add highlights and shadows using a smaller stippling brush or a fine liner brush. Apply lighter dots to create highlights on raised areas and darker dots to add shadows or depth to recessed areas. This will add dimension and realism to your miniature painting.
Step 8: Practice and Experiment
The key to mastering the stippling technique is practice and experimentation. Try stippling with different brush sizes, color combinations, and densities to achieve unique effects and textures. Don’t be afraid to make mistakes and learn from them, as this is an essential part of the artistic process.
Step 9: Seal and Protect Your Artwork
Once you are satisfied with your stippling work, allow the paint to dry completely. Remember to seal your miniature painting with a varnish or protective sealant to preserve its longevity and prevent smudging or fading.
By following these step-by-step instructions and practicing regularly, you can master the stippling technique for miniature painting and create stunning artwork with intricate textures and details.
Common Mistakes to Avoid in Stippling
While stippling can greatly enhance miniature paintings, beginners often make common mistakes that can hinder their progress. By being aware of these pitfalls and implementing the right techniques, artists can avoid these errors and improve their stippling skills.
Over-Stippling
A common mistake many beginners make is over-stippling their miniatures. Overloading the surface with too many dots can result in a cluttered and unrealistic appearance. To avoid this, it’s important to practice restraint and find a balance between creating texture and preserving the overall visual harmony of the artwork.
Uneven Dot Sizes
Another mistake often seen in stippling is using inconsistent dot sizes. This can create an uneven and patchy effect, detracting from the desired texture and shading. To achieve a more harmonious result, artists should work on developing consistency in their dot sizes, paying attention to variations in pressure and brush control.
Improper Brush Technique
Brush technique plays a crucial role in stippling. Beginners may struggle with using the right amount of pressure or finding the right brush for the desired effect. It’s important to experiment with different brushes and practice controlling pressure to create varied textures and delicate details.
Advice for Improvement
To overcome these common mistakes and improve overall stippling skills, artists can follow a few key tips:
- Start with simple subjects and gradually work up to more complex ones to gain confidence and experience.
- Familiarize yourself with the different types of brushes and their effects to choose the right tool for each task.
- Practice deliberate brush control to create consistent and intentional dot sizes.
- Take breaks and step back from your work to assess the overall balance and texture.
- Study and analyze the works of experienced stipplers to gain inspiration and insight into effective techniques.
By learning from these common mistakes and implementing the right techniques, artists can avoid pitfalls and improve their stippling skills, creating breathtaking miniatures that showcase the true beauty of the technique.
Advancing Your Stippling Skills
Mastering the stippling technique for miniature painting requires dedication and continuous learning. As you progress in your stippling journey, there are several suggestions and resources that can help you advance your skills and take your artwork to the next level.
Workshops and Classes
Attending workshops and classes focused on the stippling technique can provide invaluable guidance and inspiration. Look for local art schools, community centers, or studios that offer classes specifically tailored to miniature painting and stippling. These interactive sessions allow you to learn from experienced instructors and fellow artists, expanding your knowledge and honing your stippling skills.
Online Tutorials
In the digital age, online tutorials offer a convenient and accessible way to learn and develop new techniques. Many talented artists share their knowledge and expertise through video tutorials, blogs, and social media platforms. Seek out reputable websites and channels dedicated to miniature painting for a wealth of step-by-step stippling tutorials, tips, and tricks. Take advantage of the pause and rewind features to practice along as you follow the instructions.
Reference Materials
Building a library of reference materials can be invaluable for advancing your stippling skills. Look for books, magazines, or online resources that provide detailed explanations, illustrations, and examples of stippling. These references can help you understand different stippling styles, explore new subject matter, and experiment with various shading techniques. Don’t be afraid to analyze the works of accomplished stipplers and incorporate their techniques into your own practice.
Practice and Experimentation
One of the most effective ways to advance your stippling skills is through practice and experimentation. Set aside dedicated time for regular stippling sessions, focusing on refining your technique and exploring different approaches. Challenge yourself by stippling a variety of subjects, from landscapes to portraits, and experiment with different brush sizes, paint consistencies, and dot densities. Embrace mistakes as learning opportunities, and don’t be afraid to push the boundaries of your comfort zone.
Remember, mastering the stippling technique for miniature painting is a journey that requires patience and persistence. By actively seeking out learning opportunities, practicing regularly, and embracing experimentation, you will continue to advance your skills and create stunning miniatures with the art of stippling.
Conclusion
After exploring the stippling technique for miniature painting, it becomes evident that this method offers numerous benefits and endless possibilities for creating stunning artwork. The use of small dots or brush strokes to build texture and depth adds a unique touch to miniatures, making them truly stand out.
To achieve the best results with stippling, practice and experimentation are key. By honing your stippling skills and exploring different approaches, you can create realistic textures, intricate details, and captivating effects. Remember that mastering stippling takes time, so be patient and allow yourself to learn and grow as an artist.
As you embark on your stippling journey, don’t hesitate to share your creations with the miniature painting community. Connecting with fellow artists and receiving feedback can inspire new ideas and techniques. Together, we can continue to push the boundaries of what can be achieved with the stippling technique.
Whether you’re a beginner or an experienced artist, incorporating stippling into your miniature artwork can elevate your pieces to new heights. So grab your brushes, experiment with different dot sizes and patterns, and let your creativity flourish through the remarkable stippling technique for miniature painting.
FAQ
What is the stippling technique in miniature painting?
Stippling is a technique in miniature painting where small dots or brush strokes are used to create texture, shading, and depth in the artwork. It involves applying paint in a stippled pattern, building up layers of dots to achieve the desired effect.
Why is stippling beneficial for creating textures and depth in miniature artwork?
Stippling is beneficial for creating textures and depth in miniature artwork because it allows artists to add intricate details and realistic effects. The small dots created through stippling can mimic the textures of various materials, such as fabric, wood, or metal, and add depth to the miniature painting.
What are some other popular miniature painting techniques?
In addition to stippling, other popular miniature painting techniques include dry brushing, washing, glazing, and layering. Each technique offers different effects and can be used in combination with stippling to enhance the overall appearance of the miniature artwork.
How do I get started with stippling in miniature painting?
To get started with stippling in miniature painting, you will need a small brush with a fine tip and a palette of paints. Begin by practicing the stippling technique on a scrap piece of paper or miniature surface. Experiment with different pressure and dot sizes to create various effects. Gradually introduce stippling into your miniature paintings, starting with simple textures and gradually incorporating more complex patterns.
What are some tips and tricks for achieving the best results with stippling in miniature painting?
Some tips and tricks for achieving the best results with stippling in miniature painting include: using a light touch to control the size and density of the dots, practicing brush control to create uniform dots, experimenting with different brush sizes and shapes, and mastering the art of color blending to achieve realistic shading and highlights through stippling.
How can stippling enhance miniature paintings?
Stippling can enhance miniature paintings by adding depth, texture, and intricate details. It can be used to create realistic textures such as fur, scales, or rough surfaces, and to add highlights and shadows for a three-dimensional effect. Stippling can also be used to create patterns and intricate designs, adding visual interest to the miniature artwork.
What tools and materials do I need for stippling in miniature painting?
For stippling in miniature painting, you will need a small brush with a fine tip, acrylic paints or other suitable paints, a palette or mixing surface, and a miniature surface to paint on. It is also helpful to have a damp cloth or paper towel nearby for cleaning the brush and adjusting the consistency of the paint.
What are some common mistakes to avoid in stippling?
Some common mistakes to avoid in stippling include over-stippling, where too many dots are applied and the texture becomes too busy, using inconsistent dot sizes, which can make the stippling appear uneven, and applying too much pressure, resulting in smudging or bleeding of the dots. It is important to practice brush control and experiment with different techniques to achieve the desired effects.
How can I advance my stippling skills for miniature painting?
To advance your stippling skills for miniature painting, it is essential to practice regularly, experiment with different techniques and brush sizes, and study the work of experienced stipplers. Taking part in workshops, online tutorials, and seeking feedback from fellow artists can also help you refine your technique and expand your repertoire of stippling effects.
Where can I find resources for further advancements in stippling skills?
There are various resources available for further advancements in stippling skills. Online platforms such as YouTube and art websites often provide tutorials and demonstrations by experienced stipplers. Additionally, workshops and art classes focusing on miniature painting or stippling techniques can be valuable learning opportunities. Books or online forums dedicated to miniature painting may also offer useful tips and guidance.